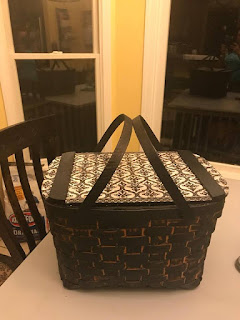
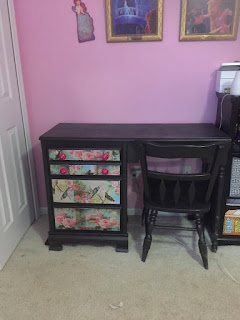
A tisket, a tasket, I made a nifty little basket.
This past summer my husband and I took a weekend trip to Chicago to spend time with some dear friends of ours. Wonderful hosts that they were, our friends knew just what kind of outtings would appeal to us most. In my case, that was checking out a few second hand shops in search of "treasures." At one of these stores, I found a cute little wicker picnic basket that needed a little love. One glimpse at the price tag, and it begged me to take it home. I happily obliged! So, how did I give it a much needed facelift? The process was a quick and fun one!
 |
| The finished product; pretty little basket with a contemporary flare. |
 |
| This basket photographed better than it actually looked. It was faded, tattered, and in need to TLC. |
For this project I used:
-ELMERS Spray Adhesive
-One Paper Plate
-Chalk Paint
-Foam Applicator
-ModPodge Adhesive & Sealer
-ModPodge Acrylic Sealer
-Matte Finish Spray
HereHereherewhythefrickcan'tIfindthis spot?

Unlike most of my other projects, this one DID have a few structural issues that needed to be corrected. Namely, the wicker in a couple of the corners was broken. The rest of the bottom was in good shape, but if those corners weren't reinforced in some way, the first time I tried to carry anything in this the bottom could have dropped out. Now, maybe some of YOU know the ins and outs of basket weaving, but that isn't a talent listed on my resume. I needed another workable fix. Enter, paper plate. I cut the plate into quarters, turned it over and molded the outer edge out in the opposite direction. From there, I used my Elmers adhesive and my hotglue gun to adhere those plate portions into the corners to reinforce them. When the painting process began, the plate fragments were covered up and my basket was once again ready to hold the weight of a picnic lunch. Fun sidenote: I actually glued myself to the basket during the process. It was good and stuck to my legs. There's the behind the scenes stuff you don't get to see often!

Time for paint! originally, I intended to paint all the crevices of the wicker and everything. I even did so on the inside. Then, I did a few swiping strokes on the outside and LOVED the look. It gives it a rustic feel I adore. That's one thing I keep in mind whenever I do projects like this, plans might change as the process unfolds, and sometimes its for the better!

Specialty decoupage papers aren't the only option. For this basket, I used party napkins with a pattern I loved. I can't stress enough how fragile the paper gets during the decoupage process. Dab the product, don't swipe or rub. Otherwise, it will shred to pieces.
Once the paper has had a bit of time to try, to make it less fragile, its time to slather on another coat of the Modpodge glue and sealer. Let that dry over night, then spray with your Modpodge Acrylic Sealer Spray.
Again, let dry over night. Then finish with two or three coats of your Matte Finish spray to protect and seal. Give each coat time to dry before reapplying.
The finished product is great for carrying snacks to kids activities, bringing a dish to pass to family functions, or to tote things car. It could be used as a gift basket, or even in place of wrapping paper or a gift bag for your next gift giving occasion!
I DO have more of these baskets and plan to make more of them. In fact, I MAY even put a few up for sale. With that in mind, what kind of themes or style ideas would you like to see? Disney? Christmas? Neverland? Soccor Mom? Superhero? I want to hear those ideas!


Comments
Post a Comment